"Do you smell that? It's fixer! I love the smell of fixer in the morning..."
A blog about analogue photography, a showcase of mostly medium format photos made and developed in the old way
I love portrait photography, it's unbelievable the connection you get to establish with people trough this kind of photography. This picture belongs to a series I'm still working on, called I Love You but I've Chosen Darkness by which I try to photograph and reproduce by lighting that "something broken" people sometimes carry inside.
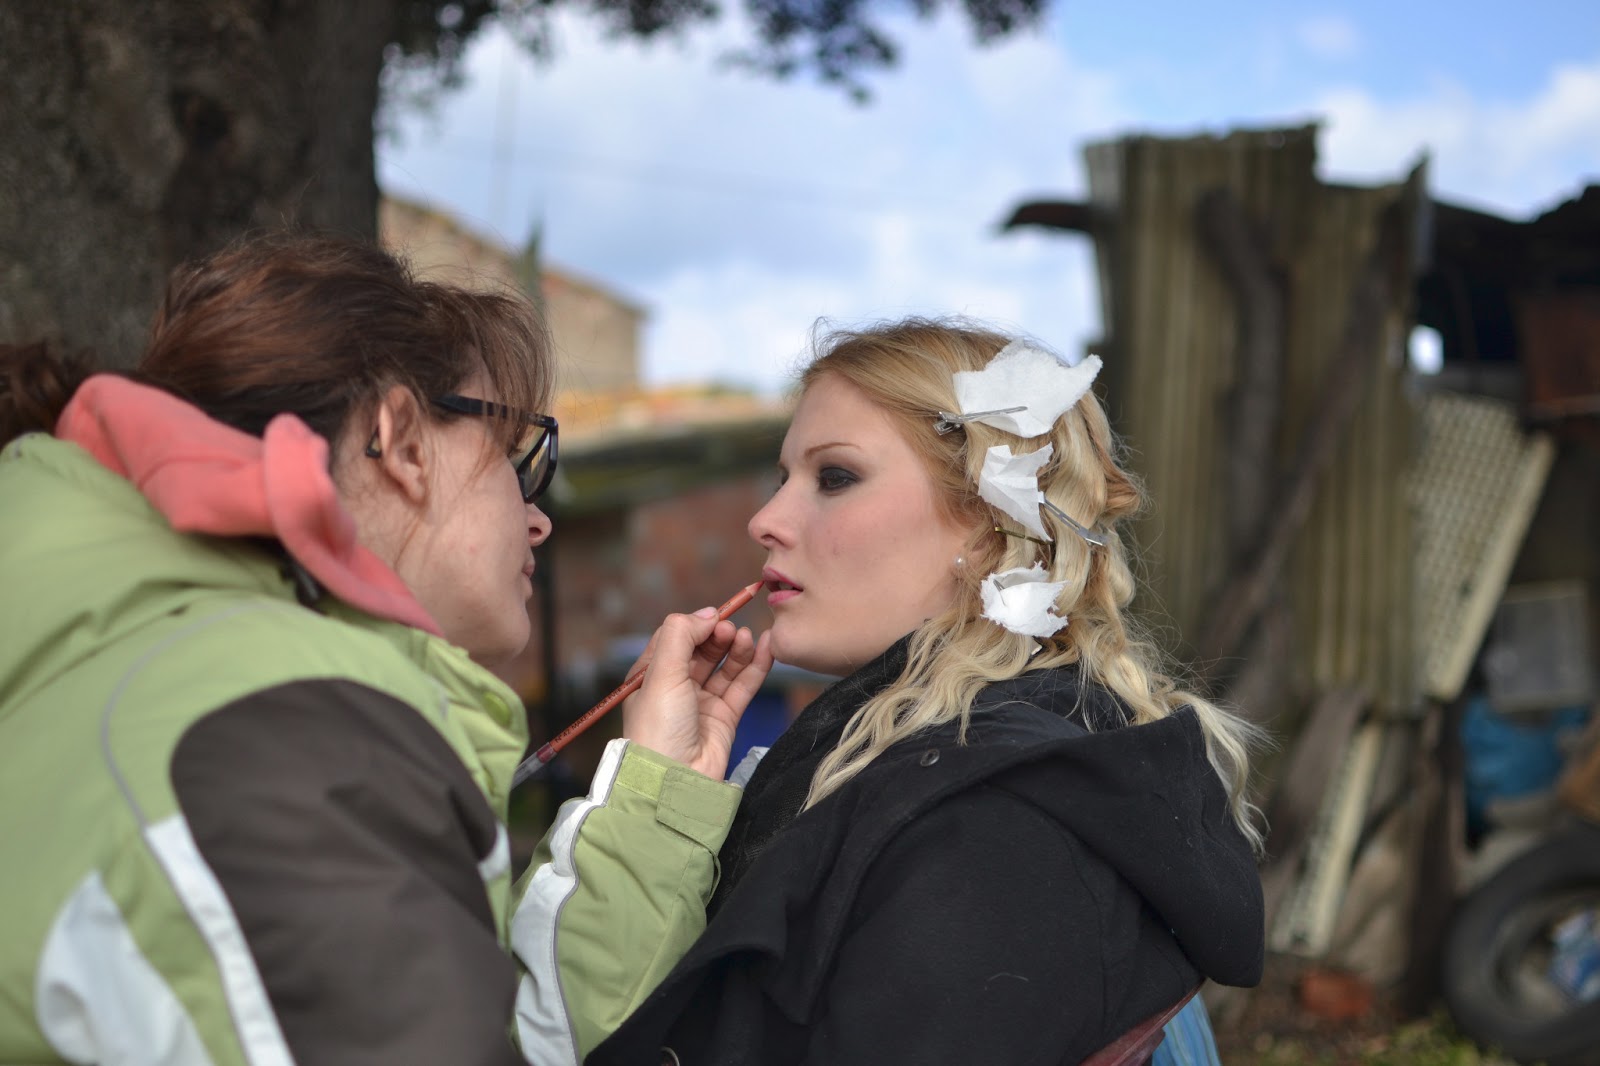
This is the making of the fashion shooting we did some days ago in a location in the centre of Barcelona. It was shot on medium format using Portra 400 film. You can read how it was prepared here. In the next days I'll be able to show you the result of the session.
Thanks to Nuria Herrero who shot and edited the behind the scenes video.
The repetitive pattern of the stones, the circular form of the wheels and the arches, the light bursting out from the little window creating a gradient with shadows looking like a natural vignette... And the subject: that old cart resting in the unused stone stable after years of service. What would have it carried? and where? It was just perfect. I was in the right place at the right time: minutes after I took the photo that light was gone, leaving the stable in almost total darkness and the cart visually silent.
There are several ways to dispose lights: it will depends on the scene we want to light, what part of the scene we want to highlight, what we don't want to, the mood we want to give the whole scene...
The most common lighting set-up is the triangle set-up, where one light is positioned on the right side of the camera and the other one on the left side. Distance from the camera, angle, height of the lights depend on your choice; someone will tell you one thing about this matter while someone else will tell you exactly the opposite. It doesn't really matter!
The important issue is that the two lights differs in power: the Key light has to be more powerful than the Fill light; by this we will get some contrast and depth in the image and, most important of all, the light in the scene will have a direction.
Depending on where lights are positioned on the side of the camera, only two situation can occur: each one of the two lights falls on different areas of the subject or they overlay summing its lights.
When lights overlay on one part of the subject we will have a sum of the two lights while the opposite side will be lit just by one. This will give us the contrast of the scene. The most common contrast used is the 1:3 contrast, where the brighter part of the subject is lit 3 times more than the other side. It's the easiest contrast to get because you just need the key light to be twice as powerful as the fill light.
In a portrait, if the brighter side of the subject faces the camera, we are using a broad lighting set-up; if it's the darker side facing the camera, we are using a short lighting set-ups.
Broad lighting
Deciding which one of those we should use it is not only a matter of mood because these two lighting set-ups have a strong effect on a subject's features: broad lighting widens while short lightning narrows.
I was walking in the Botanic Garden of Rio de Janeiro (as you guessed from the silhouette of the Corcovado) when I saw this young girl with an unusual dress walking quite in a hurry. I had my camera loaded with Fuji Superia X-tra and shot without hesitation, then I followed her. Who was she? Where was she going to? Why was she dressed like that? Few minutes later I had all the answers but I like to remember her as a carioca exotic flower
When I prepare a shooting I like to have meetings with all the team so everyone know what it is about and what my idea is, I tell them what I want and hear suggestions that can make the idea go a step further. We create the shooting together. This way everyone will feel more involved and motivated and the work during session will flow smoothly. I firmly believe that the most important aspect of every kind of shooting is communication.
9:00 All the team meet at the chosen studio in the centre of Barcelona.
9:30Laura, the model, is with the MUA. Normally I would be there, talking to her and explaining the idea of the shooting, the poses I want, etc. But this time I had the opportunity to meet her before the shooting so we already went trough the mood-board and had a long talk which helped the model to feel comfortable during the shooting.
9:45The stylist prepares dress and props, I help my assistant to set up the lights. Every now and then I pop in the make-up room to have few words with Laura to maintain the complicity we built.
10:30 I load the films into the backs of my camera; we shooting on Kodak Portra on a medium Format camera. My assistant cleans the lenses we will be using.
10:45 Laura is almost ready. Checking last details before start shooting.
10:50I meter the light to be sure the exposure is the one I want, meanwhile I keep talking to Laura and remind her the mood she has to express in this shot
10:54I take some polaroids to check that light and shadows are the ones I was after. I also study them looking for what doesn't work and correct it.
11:02Ready to shoot! I take 5 or 6 photos with little differences in pose and then we change dresses, set and lights starting all over again.
18:00The session is over. We had 6 changes for dresses, make up, hair style and set. Every one is tired, it was quite hard, but it isn't over for me: I can't wait to get to the studio and start developing the film rolls with the C41 process.
Do you want to know the result of this shooting? Stay tuned then!
I love abandoned places. They are full of untold stories and waiting for a camera to immortalize them before disappearing for ever. Like this old gas station on the road to Bushmills, Northern Ireland. I waited the all day in order to get a decent light. After self developing the film with the C41 process and seeing the result, I could see that the wait was well worth it.
Trance is the last work by very well known director Danny Boyle (Trainspotting, Shining, Slumdog millionaire, 147 Hours...) shot during a break among the two tears preparation for the London Olympic show.
The plot. An art auctioneer who joined a group of criminals for an inside job, has to seek the help of hypnosis to find a lost painting. But the line between reality, suggestion and desire becomes more and more undefined.
Cinematography: Anthony Dod Mentle
Camera: Arri Alexa, Phantom Gold, Canon Eos 1D MarkIV, Canon Eos C500, Indiecam IndiePov
Danny Boyle confirmed again his usual collaborator Anthony Dod Mentle as cinematographer for Trance. In the first image of the film the light is quite theatrical and expressionist, then the following scene the light becomes natural. I could not understand the meaning of it till the plot develops: the whole movie is a game between reality, hypnotic suggestions and lies, creating confusion among characters and audience. Mentle played with this confusion by using light in different ways, alternating naturalism and expressionism with a tendency for the last one, never, or almost never, justifying the light source and always positioning the light source on the side of the character creating a strong contrast (1:3 or even greater sometimes) on the face of the actors leaving it half in shadow, with a stronger split for Vincent Cassel and James McAvoy and a softer one for Rosario Dawson. This lighting set-up creates a chiaroscuro throughout the film that highlights the fact that no one of the characters say entirely the truth and everyone seems to be hiding something.
The use of the rim light helps this concept too: it is quite strong, often used as key light, sometimes exaggerated (and blowing some areas of the image) and always helping to create a sense of mystery, strength and menace. Memories play an important part in the film: Mentle gives them different texture and aesthetic using different cameras and a huge selection of lenses: of course he used the Phantom for the high frame rates shot and the indiPov , the world smallest HD camera shooting RAW, for placing the camera in unconventional places; when shooting with the Eos camera, he added a soft diffusion filter on the lens to soften the hard line Canon cameras produce. The choice of the focal length is never extreme, apart from few shots were an extreme wide angle lens is used and where the camera is placed at a very low angle.
There's no camera movement worth to point out because Mentle used instead peculiar locations to help telling the story visually: they are full of shimmering surfaces, creating multiple reflections of the characters, in great consonance with the plot. When he could not manipulate the surface, he used flares. Another interesting decision is the use of colour in some scenes: a single colour pops out vivid from the rest which are quite dull, like the scene of the Selfridges bag.
Anthony Dod Memtle made a very good job with the cinematography of Trance, a film well crafted and entertaining, but, honestly not as good as other Danny Boyle's works: he has proved that he can make far better films.
Cinematography: Laurie Rose
Camera: Red MX
Aspect ratio: 2.35:1
Format: RedCode RAW
Film Stock: -
- See more at: http://donatelloromanazzi.blogspot.com.es/p/film-review.html#sthash.LrYRPyVT.dpuf
Unlike natural light, artificial light can be controlled to our discretion in every way: direction, intensity, angle, colour... When in a studio, you have infinite options to light a subject; there are photographers who only light with one lamp, others use 6, 7, 8 different lamps. There's not really a rule to decide the number of light points to use: what is important is getting the illumination and shadows you wanted with a light setting you are comfortable working with.
If you are getting started to studio light, it may help you to know that there are some basics lighting set-ups most of photographers work with. But before explaining them it is essential to know the types of light yon can employ in a studio.
Key light. It gives the direction of light and the level of luminance of the scene (it's the most powerful lamp lighting the scene).
Fill light. It is used to fill up the shadows and reduce contrast. It may fall all over the scene or just on a part of it. It can be replaced by a reflector bouncing the key light.
Rim light. It is positioned behind the subject pointed to the subject's back. It separates the subject from the background creating a halo around the subject's outline.
Background light. As it name suggests, it lights the whole background or some small parts of it we want to emphasize. It can be also used for creating patterns of light on a Cyclorama.
Hair light. Similar to rim light but positioned higher and pointed to the hair highlighting it.
Texture light. Positioned on one side of the subjects. It is a must in fashion photography because it reveals texture and the nature of the material.
Colour light. A frontal light which helps with colour saturation.
Now that you know the basis you are ready for the following step: how to position them. So stay tuned for the next post!
The Giant's Causeway is a coastal area made of basalt columns which resulted after an ancient volcanic explosion. It is placed in county Antrim, Northern Ireland, and, according to the legend, the columns are the remains of a causeway built by a giant. The dark tone of the stones and the foamy sea made it perfect for a contrasty black a white photo. Getting soaked was worth it!
Landscapes photography might seem easy because your subject is there, waiting for you to arrive and shoot. That is absolutely wrong. Of course it might happen to show in the right place at the right time and find a magnificent view bathed by a perfect light. But it's one out of a million chance. Landscape photography, like every kind of photography, needs to be planned.
You have to know the place you are going to photograph, where the best spot is, where you take the most of the light accordingly to the time you are there
You have to know when you'll have the best light in that place, not only the best one of the day but also of the year.
You have to know how colours change during year and seasons.
You have to know how the weather will evolve and if it will affect your photographs.
Natural light is a very good quality light but it has limitations as well, the most important being the fact that we cannot dispose of it any time we like. High sun light is perfect for taking saturated images, sunset and sunrise produce delicate and contrasty photographs; overcast days might produce dull photos but they are perfect if you want to reproduce details because light is even and no-directional; haze and mist can add strong mood to the images, as well fog when strong shaped subjects are portrayed.
Graduated neutral density filters (GND) are a must to reduce the high contrast between the sky and the land (yes, you could bracket different exposed shots and produce an HDR image, but this option is only available for digital camera users). Sliding up and down the GND filter while taking a long exposure photo will help you to get better looking images: not all the zones of the picture need to be stopped down by the same value.
Effect of Big Stopper filter at sunset
There are some filters that cannot be reproduced in editing softwares that you should carry with you while photographing landscapes: a Polarizing filter and a Neutral Density filter. The first one lets light of a specific polarization pass and block waves of other polarizations (which produces a colour saturation effect and removes reflections). The ND filters, especially the "Big Stopper" a 10 stop ND filter, allows you to take long exposure photographs in full sunlight without blowing the exposure.
Catastrophe and the Cure. Black and white film portrait.
As soon as I saw this bridge for the first time, I "saw" this photo: I liked the contrast between the fence and a white dress. Few days later, on a cold autumn morning, Karmen helped me to make it. It was the first photo of a project I am still working on, a series of portraits of women which I called Catastrophe and the Cure. Do You want to be part of it?
Sightseers is a British black comedy by Brighton based director Ben Wheatley (Kill List, Down Terrace); it was screened in the Director's Fortnight section of Cannes Film Festival last year.
The plot. Chris takes her girlfriend Tina, who never left her house and her mother, to a trip around Yorkshire with a caravan. But soon unfortunate events make them become condescending psycho killers.
Cinematography: Laurie Rose
Camera: Red MX
Aspect ratio: 2.35:1
Format: RedCode RAW
Film Stock: -
Ben Wheatly knew Laurie Rose when shooting Down Terrace, which was the first film both of them ever shot; since then Rose has DP'd all Wheatley`s work, including Sightseers. In an interview after the film première, Rose insisted that he was not comfortable with being called cinematographer or DP: he was just a simple cameraman. After watching Sightseers I realized that he was not trying to be just modest: Sightseers lacks in cinematography.
Light crew was reduced to a minimum and so were lights used and that can be noticed since the very first scenes, where the image is quite flat and the contrast poor. Light is natural and quite soft, almost shadows free, even in the exteriors, where the typical British overcast days helped to diffuse light. When the sun came out though, we can appreciate some harsh light and strong shadows creating an atmosphere that doesn't really serve the story.
The camera Rose chose was a Red One with MX sensor, a great camera, but he didn't manage to get the best of it. Throughout the film there are scenes (indoor or outdoor shots) with very bright spots with blown out highlights, which is quite unusual for a camera with 13 stops of dynamic range. Also Roses didn't used many lenses, sticking basically to the 50mm Arri Zeiss and switching to wide angle lenses for landscapes, to keep the natural look of the film, almost shot as it were a documentary. Camera movements are very little used; often camera is hand-held and sometimes placed in very low angles (and perhaps missing a wider angle lens), different and unexpected decisions that never contribute visually to the story.
It looks like Rose limited himself to expose correctly the scenes, but, as we have seen in past posts, cinematography is much more than this and a correct exposure is not always the right one. Some scenes of Sightseers though are beautifully shot: some foggy landscapes and scenes filmed outdoor at sunrise or sunset, some back-lit, others with wanted gorgeous flares, but all of them with nice contrast and tones and shot with wide angle lenses.
Sightseers is a (literally) bloody good fun but also a bit obvious and predictable, and probably less mysterious and interesting than Wheatley's last work, Kill List.
Cinematography: Emmanuel Lubezki
Camera: Arricam LT, Arriflex 235, Panavision, Red MX,
Lenses: Arri Zeiss Master Prime
Aspect ratio: 2.35:1
Format: 35mm, 65mm, Redcode RAW
Film Stock: Kodak 5218
- See more at:
http://donatelloromanazzi.blogspot.com.es/2013/06/film-review-analysis-of-cinematography.html#sthash.1odzoTYW.dpuf
Cinematography: Emmanuel Lubezki
Camera: Arricam LT, Arriflex 235, Panavision, Red MX,
Lenses: Arri Zeiss Master Prime
Aspect ratio: 2.35:1
Format: 35mm, 65mm, Redcode RAW
Film Stock: K
- See more at: http://donatelloromanazzi.blogspot.com.es/#sthash.KI6SyFZy.dpuf
Cinematography: Emmanuel Lubezki
Camera: Arricam LT, Arriflex 235, Panavision, Red MX,
Lenses: Arri Zeiss Master Prime
Aspect ratio: 2.35:1
Format: 35mm, 65mm, Redcode RAW
Film Stock: K
- See more at: http://donatelloromanazzi.blogspot.com.es/#sthash.KI6SyFZy.dpuf
Cinematography: Emmanuel Lubezki
Camera: Arricam LT, Arriflex 235, Panavision, Red MX,
Lenses: Arri Zeiss Master Prime
Aspect ratio: 2.35:1
Format: 35mm, 65mm, Redcode RAW
Film Stock: K
- See more at: http://donatelloromanazzi.blogspot.com.es/#sthash.KI6SyFZy.dpuf
Cinematography: Emmanuel Lubezki
Camera: Arricam LT, Arriflex 235, Panavision, Red MX,
Lenses: Arri Zeiss Master Prime
Aspect ratio: 2.35:1
Format: 35mm, 65mm, Redcode RAW
Film Stock: K
- See more at: http://donatelloromanazzi.blogspot.com.es/#sthash.KI6SyFZy.dpuf
Cinematography: Emmanuel Lubezki
Camera: Arricam LT, Arriflex 235, Panavision, Red MX,
Lenses: Arri Zeiss Master Prime
Aspect ratio: 2.35:1
Format: 35mm, 65mm, Redcode RAW
Film Stock: Kod
- See more at: http://donatelloromanazzi.blogspot.com.es/p/film-review.html#sthash.tIPS4wjN.dpuf
Cinematography: Emmanuel Lubezki
Camera: Arricam LT, Arriflex 235, Panavision, Red MX,
Game of Thrones is the HBO TV series everyone is talking about, but, have you ever wondered how they shot it?
Shooting Game of Thrones
Like every production of its genre different directors and cinematographers have been working in different episodes: the challenge was to match visions and maintain a certain consistency to the whole series. This task wasn't easy at all, considering that the story develops in dissimilar locations spread from the snowed north down to the sunny south and the shooting time they had was almost the same of a one location TV series: about 18 days per episode.
During the preproduction, several tests were made to chose the best camera possible to achieve functionality and good quality; this time digital won the battle with film: Arri Alexa camera was chosen for its characteristics similar to films, details in highlights, noiseless images in very low light conditions (Alexa recommended ISO is 800) and of course the quickness of delivering and watching dailies (raw, unedited footage of the shooting day). As I said, Games of Thrones was shot in different locations (Iceland, Northern Ireland, Croatia, Malta, Morocco...) because every kingdom has its own climate and environment; this wouldn't have been possible if they didn't have two units shooting simultaneously: dailies and flip books with screen shoots of the scenes and locations were absolutely necessary and consulted by cinematographer to give consistency to the shooting.
Above, the original frame. Below, after VFX
Every kingdom has a different look: blueish and cold for the Wall, a sort of Mediterranean feel for King's Landing, harsher light in Red Waste and Quarth; but the way of shooting and lighting is basically the same. The camera is often hand held, crane and dolly are used but not excessively, the focal length of the lenses (they used Cooke S4 and Angenieux Optimo zoom lenses) is normally between 21mm and 85mm. Light is natural but expressionistic: windows, doors, fireplaces, candles, etc. are used as light-sources but light is always exaggerated making the scene more dramatic. Low light scenes are abundant: lots of scenes were lit just with candles taking advantage of Alexa´s characteristics; or, especially in the scenes shot in the snowed woods of the North, Wendy lights mounted on high cranes were used to simulate the light of the moon. Quite often the Key light is place behind the actors, shot in back-light.
Above, the original frame. Below, after VFX
The art direction department made a great work creating a new world from the scratch, inspiring themselves in different cultures from modern and past time achieving a really believable result. Another aspect which gives credibility to the scenes and the whole series is the use of visual and 3D effects created by the Irish VFX company Screen Scene, which, apart from animating dragons and other creatures, changed and beautified landscapes and castles, multiplied people and objects and made battles far more spectaculars.
Game of Thrones managed to gather more and more public throughout the 3 seasons and today, Monday 10th of June, season 3 finale will be aired. But their fans should not wait too long for new episodes: the filming of season 4 will start on July.
Here's some photos of the recently published fashion shooting we did in the countryside for Iconic Bcn. I wrote an "How I shot it" post with a light diagram of the image on the right, you can read it here.
Make up and light metering were crucial for this shooting because the camera used was an analogue one and the images didn't go through Photoshop.
If you are shooting indoor you do not always need artificial light to expose your pictures: you can do a magnificent job using just available natural light.
You just need a room with a window and sun light, of course. You could
use the window as a back (or rim) light to create a silhouette of your
subject or you can move around and use it as side light: depending on if you expose for the mid-tones or the brighter side of the subjects, you'll get different results.
A reflector or a white board might be very helpful: it's perfect to bounce and soften the light to create a more delicate mood or to fill up shadows; but be careful with the kind of white you are using!
some materials, for its composition or the way they have been washed,
produce ultraviolet light, resulting in a blue cast in the image. Depending on where the reflector is positioned it will create a different atmosphere.
If it is held in a higher position, imitating the sun, the look will
be very natural, if it is held down bouncing up the light, it will
create a more artistic effect.
I prefer using north light when shooting indoor because it's softer and I don't have to deal with heavy deep shadows; however there are situations when direct sunlight is more suitable: when you want to play with high contrast or with shadows of the window drawn on the subject, for example.
As
always, the key of photographing indoor with natural light is to stay
creative: you have to move around, not only to get the best composition,
but to see how the characteristics of light change; you have to play
with light and shadow, stay alert and take advantage of opportunities: a single ray of light passing through a window slightly ajar it's enough to shoot a stunning image.
June 06, 2013
The other Ireland. Boats in Castle Cave.
The Ring of Kerry, Ireland, is full of beautiful places. But, if You leave the main road (and jump some fences..) You can find another Ireland, a different and hidden one, probably less idyllic but not for this less spectacular, like these two boats waiting for the high tide in Castle Cave.
Few days ago I had the opportunity to watch again To the Wonder, a film by Terrence Malick who needs no presentations: The tree of Life, The thin red Line, The new World, Badlands are some titles of his filmography. It was a great delight to enjoy once again the work of one of the best cinematographer of the present time: Emmanuel Lubezki.
The plot. An American falls in love with a divorced girl living in Paris. She follows him and settles in Oklahoma but problems arise in their relationship. Meanwhile, a priest struggles against his faith.
Cinematography: Emmanuel Lubezki
Camera: Arricam LT, Arriflex 235, Panavision, Red MX,
Terrence Malick relies once again on the cinematography of Emmanuel Lubezki whose filmography is quite extensive ( Ali, The New World, Sleepy Hollow, Meet Joe Black, Y tu mamá también...). As he already did it in The Tree of Life, the mexican cinematographer only makes use of natural light for filming To the Wonder, using just bouncers and blockers. According to him, "natural light is more complex than artificial light and once you master it, it is hard to go back and illuminate a scene artificially". He not only did an excellent job with that but also taught (or reminded) everyone that everything has to serve cinematography to visually tell a story in the best way possible: not only trough light, costumes design and colours, lenses and camera movements, but even trough the film stock, the camera itself and the format used.
Throughout the film, Lubezky always seeks back-light; in the exterior shots the sun is always low in the horizon and quite often in frame, he plays with it, positioning the actors between it and the camera, avoiding the silhouette and shooting them shadow free, and looking for light spills and flares every time they move, overexposing some areas of the frame. In the shots taken indoors the back light is more extreme: he uses doors and windows as light sources and the actors are dense black silhouettes. Shooting indoor must have been complicated: with light changing constantly Lubezki only had few useful hours in every location. They shot fast and they shot a lot, because they didn't have to "waste" time moving lights, and probably shot some hours in a house and some hours in an identical one but architecturally different to take advantage of the entire shooting day.
In the few night time shots, available light of lamps is used: they are always in frame and overexposed, creating great contrast in the scene.
Five different cameras were used to shoot To the Wonder. The film starts with some images of the couple in a train taken with a digital camera full of digital artifacts but it does remind a super-8 camera and the feeling of holiday and happy memories, like the beginning of a relationship. When Marina (Olga Kurylenko) goes back to Paris, Lubezki follows her alone in the street at night using a Red MX, giving a sense of modern and urban life (in contrast with the Oklahoma surroundings) as well as a sense of cold solitude. All the rest of the film is shot in 35mm apart from the scenes where Ben Affleck starts a relationship with an old friend, Rachel McAdams: here the 65mm negative is used. This relationship is less romantic but more stable than the one with Marina: for Lubezki the 65mm reflects this more realistic stability.
Camera is rarely static: always flowing with the characters, mostly following them, on a steady-cam or hand-held, and always going forth, suggesting the idea that life always goes on. Lubezki chose, as in The Tree of Life, Master prime lenses which offer a very clean and sharp image, mostly using wide angle lenses, achieving a very great depth of field which suits perfectly Malick's way of directing especially because the director rarely leads the eye of the spectators toward the actor, and offers them the whole frame instead.
Terrence Malick is a peculiar director with a peculiar style pretending to make poetry with images. You can like his style or hate it. And To the Wonder is no exception. The movie was shot without a script, almost has no dialogue and no plot nor action: it is absolutely visual, showing moments of the life of a couple and it's up to the spectator to shape a story. Whatever you like his style or not, To the Wonder is a cinematographic piece of art which confirms Lubezki as one of the best living cinematographer capable of creating stunning beautiful images and a visual storytelling second to none. To the Wonder is an exquisite visual experience, completed with great music and editing, that will undoubtedly be in this year top five best cinematographies.
When we were preparing this fashion shooting, there was one thing my Art Director, Gemma, and I had clear in mind: contrast. So we decided to develop the entire shooting around it. Models, locations, dresses, attitude... everything should reveal the idea of contrast. Once again I chose a Medium Format analogue camera because, apart from being my favourite photographic format, it was the perfect combination with the idea we developed.
Tmaxx 400, ƒ11 t1/125
Two elegant ladies in the countryside, in a filthy and decaying place far from the town where they can freely love themselves in a less platonic way. It's around 1920, as the hair style suggests; the ladies could be an aristocratic woman and her servant... This is, briefly, the story we told trough the shooting. I wanted the images to remind the feel of that time, that's way I shot analogue and that's why I used black and white film.
I chose the film I am most comfortable with, Tmax 400 and a 80mm lens on a medium format camera to respect the naturalism of the whole idea. I used just two lights for the shooting; well, actually three lights if we count the light of the overcast day we had which played as ambient light.
The key light was positioned behind the models, at camera right: it was a naked flash so the light would have scattered all over the place imitating the sun. In front of the models, on camera left, I placed the fill light: a huge octagonal softbox 150cm wide which provided soft and diffused light wrapping the models and able to illuminate both of them. I placed it on one side because the shadows it produced on the blonde model's face were very suitable for her physiognomy.
I used a Y8 filter to whiten the blond model's skin and to accentuate the contrast of the scene. Even if I love grain, this time I controlled the agitation during the negative development because I looked for the fine grain the Tmax offers and played with the time of the process to enhance the contrast.


.JPG)
+13.46.53.png)
+13.49.26.png)


