Showing posts with label photography. Show all posts

December 30, 2013

The Jefferies' Stories. A new project


L. B. Jefferies is the main character of Alfred Hitchcock´s film The Rear Window, a photographer who spies his neighbours with binoculars.

With this series I imagine what he would  photograph if he could access to the most intimate rooms of today's people.

December 06, 2013

Camera lenses. What they are and how to choose them (II)

Following part I.

Telephoto lenses. They have a narrower field of view than wide angle lenses; this normalizes the relative distance and size between objects placed at different distances if compared with wide angle lenses: closest objects will appear similar to farer ones because, due the narrow field of view, far objects will cover a large portion of the angle and the distance will appear compressed. They are normally used to photograph subjects you are not able to approach filling the frame with them, as in wildlife or sport photography. But this use would be very reductive. Telephoto lenses can be used in landscape photography for example, filling the frame with a single element or selecting a portion of landscape; or you can take advantage of the appearance of compressed distance and play with different layers of landscape compositions or exaggerate the density of a pattern. The most known aesthetic characteristic of telephoto lenses is the shallow depth of field they can achieve at a given distance (the compressed distance enhance and magnify the out of focus area), which is great for isolating subjects from the background, very useful for portraits.

Prime and zoom lenses. While the prime lenses have a fixed  focal length, zoom lenses have a variable one. Prime lenses tends to be smaller and, generally, they offer a better optical performance than zoom because the light passes trough less optical elements, even if nowadays the difference is not that big as it used to be. Diaphragm aperture thou, will always be bigger with prime lenses and  it may varies in the zoom lenses, according to the focal length it is used. On the other side, zoom lenses are practical for the kind of photography in which you have to constantly switch from one focal length to another.  So which one should you choose? As always, it depends on you and your photography, but remember to stay functional. For the kind of photos I make, I prefer prime lenses and I think that the best zoom are my feet (because I like better the change of relative perspective than magnifying the whole image), while for some one else it is more practical to carry and use 3 zoom lenses than  6 or 7 different prime lenses...

Next, special lenses. Don't miss it!

November 14, 2013

Camera lenses. What they are and how to choose them in photography. Part I

A camera lens is an optical device which captures the light in a scene and focus it onto the film or digital sensor. It is made of several lens elements: extra refractive glass (which alters the angle of refractive light), aspherical elements (correcting into focus peripheral rays), low dispersion elements (which reduce chromatic aberration), anomalous dispersion elements (to control the amount of diffraction of light for a specific color range). The quality of these elements will determine the whole quality of  lens and image captured.

Lens is probably the most important part of a camera so you should carefully choose it when buying a new camera or upgrading a lens. But, with so many options out there,  which one should you choose?

To answer this question you need to answer several other questions, like which focal length you need, which the maximum aperture, or the fastest focusing, or the sharpest image, or the softest bokeh...  You also need to know the size of the sensor or your camera because the focal length may change: to make a focal length of 50mmm on 35film (or full sensor) equivalent on APS-C sensor (which is smaller) you need a 35mm while you need a 25mm for the micro 4/3 (even smaller) or a 80mm for a medium format (bigger than 35mm). The best advise is to choose your camera lens according to what you photograph and to your photographic style. But you have to know about lenses to be able to make the right choice. So let's have a look at them!

Standard lenses. When a lens has a focal depth in the range between 35mm and 70mm it is called standard lens because it resembles the way the human eye sees things (about 50mm on a 35mm film): subjects will have the same size and the same proportions as seen trough the eyes. They are general purpose lenses, ideal for the kind of shots people normally take. This is the range that the kit zoom lenses supplied with the camera cover: these are very cheap lenses that do their job but the quality is quite poor; so, if you want to get any serious about photography, change them!

Wide-angle lenses. When a lens has a focal length minor than 35mm it is considered a wide-angle. Most people say that they use these lenses to fit the scene in the shot when they can't move further away: don't listen to them! This use is very reductive for a wide angle lens; photographers use it for the opposite reason: to get closer to the subject (street photographers make great use of these lenses). The wider vision and the really close minimum focus distance are characteristics that play in favour of creativity. Wide-angle lenses exaggerates the relative proportion of objects at different distance, making the closer one appear bigger; this emphasizes objects in the foreground but can turn a portrait in a caricature.  Line and curves are exaggerated too due to the barrel distortion; photographing converging lines can be tricky (you should always aim to the horizon to avoid them or correcting them with an edition software if you don't have a tilt-shift lens). One more thing to take care of while shooting with wide-angle lenses is the light changes throughout the image due to wide portion of the scene in the frame, both horizontally (this variation can be corrected with GDN filter or bracketing for HDR) and vertically attention to the position of the light source is needed: the closer the light source is to the frame, the whiter will be the image (think of a clear sky, with the sun out of frame, which turns from deep blue to white).

If the focal length is greater than 70mm the lens is called telephoto.  Do you want to know more about it? Stay tuned for part 2!

October 17, 2013

The Green Bridge.


This picture was taken some time ago: I was testing the C-41 processing with Kodak Portra and Fuji Superia X-tra. I still love the way the sun, hidden behind the bridge, brightens the green fence up.

October 16, 2013

Light tips. How to light a subject with large nose.

Every subject is different and has different characteristics, that's why we have to light every subject with different light: lighting is a powerful tool to hide or enhance features in a portrait. Here are some tips about how to light a subject with large nose.

Do not use a harsh Key Light: it will creates deep shadows and make the nose look larger.  Also, avoid emphasizing the shadow of the nose for the same reason.

Do not use a wide angle lens close to the subject: a wide angle lens changes the relative size of the objects so, the closer you'll get to the subject the larger the nose will appear. Use a telephoto lens instead to control and reduce proportions.

Do use a frontal Key Light: it will minimize shadows; but avoid placing it high.

Do use the camera at a low angle: it will change the perspective and the nose will not appear as large. If it is not possible, frame the whole head in the shot and tell the subject to tilt the head up a bit: you will get the same effect.

Hope you find it useful! Stay tuned for more lighting tips!

October 11, 2013

Light tips. How to light a subject with a wrinkled face.

Every subject is different and has different characteristics, that's why we have to light every subject with different light: lighting is a powerful tool to hide or enhance features in a portrait. Here are some tips about how to light a subject with a wrinkled face.

Do not use a harsh Key Light: it will produce deep strong shadows and intensify wrinkles.

Do not use Back Light on one side: a side light enhances textures: placing a back light on one side of the subject will emphasize wrinkles.

Do use a frontal Key Light: a light placed in front of the subject will reduce textures. Avoid placing it too high or you will have the same negative effect of a side light. Place it low instead.

Do use soft low Fill Light: it will fill up the shadows of the wrinkles created by the Key Light. Lowering the contrast will also help to mask wrinkles.

Hope you find it useful! Stay tuned for more lighting tips!

October 10, 2013

The colors of Autumn in Montreal


I was walking around Montreal the other day, a rainy one. All of the sudden the sun managed to come out for a brief moment lighting the trees across the street. I didn't hesitate and took a pic with my iPhone. Sometimes the camera isn't really important: it's all about light.

October 04, 2013

The psychology of colour in cinematography. A study of The Last Emperor

Vittorio Storaro is one of the best cinematographers of all time. We can admire his magnificent use of light in film that will remain in our memories, like Apocalypse Now, Last tango in Paris, 900, Dick Tracy and, The Last Emperor. In the latter, his studies and experiments with colours as a mean to communicate emotions reach a high grade of expressive maturity that powerfully enhances the already magnificent cinematography of the film. As you all know, the film deals with the last emperor of China, from his birth till he becomes just another worker of the People's Republic of China, it is an introspective story of the Emperor. According to Storaro, every particular colour is not only a bridge with a particular emotion but light and colour make react body and mind in different ways (daylight is associated with activity, for example, while night is with reflection); colours can also be associated with a particular age of our life,  so he decided to separate the different ages of the Emperor chromatically, lighting with different tone of lights accordingly to the age and mood. But he didn't limit himself to just play with hues, he also created contrast with colours (as he already did in Apocalypse now) and played with the colour of objects in scenes using what in literature is called anaphora, a repetition of the same colour, in our case, to emphasize a concept.


In The Last Emperor's first scene we see a group of prisoners arriving to a station and waiting for being transferred to a prison. The Emperor is among them. The scene is quite dark, in a grey tone, with practically no colour. Grey is an undefined colour; it represents the waiting, the reflection, the preparation for a new journey, for the start of a new life. All the scenes in which the Emperor is in jail are in grey

 
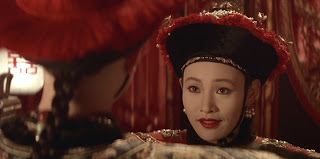
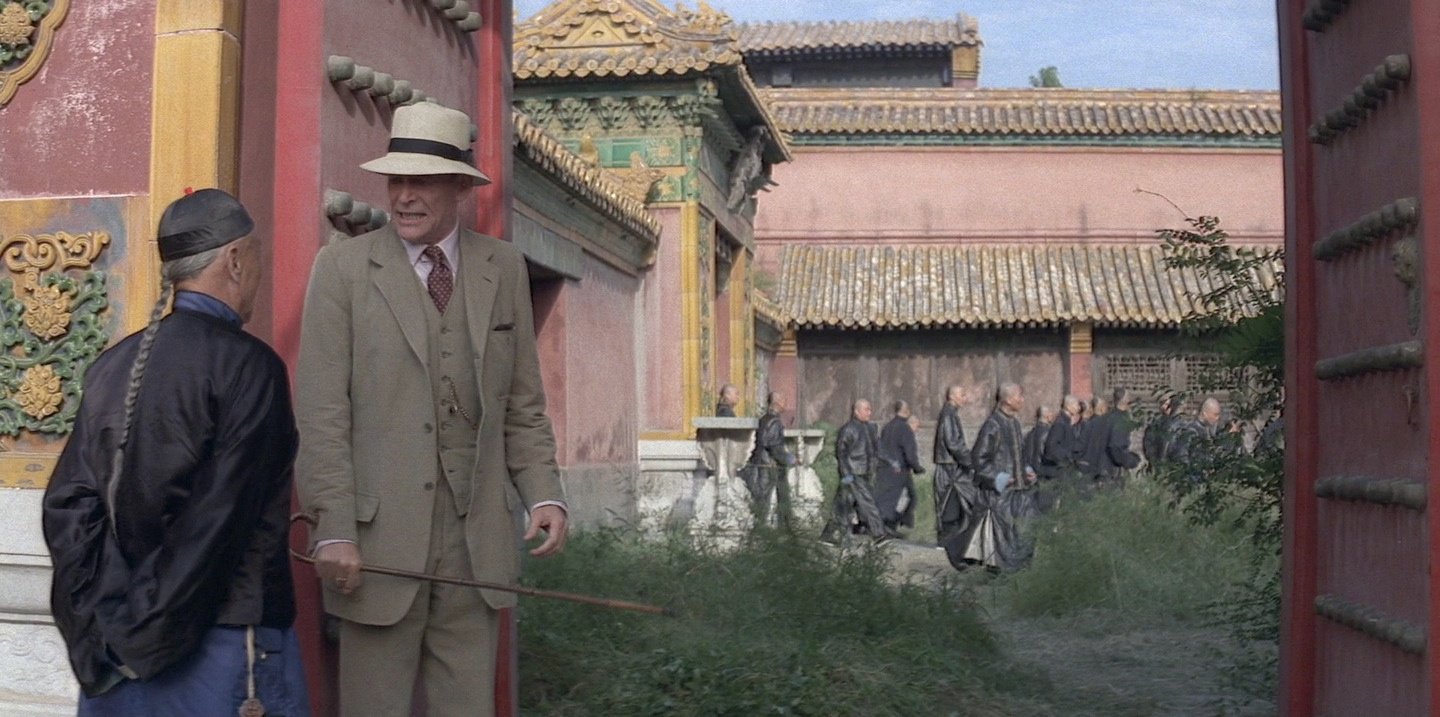
While at the station, the Emperor try to commit suicide, which is itself a symbol of death and rebirth, and we see the first colour: the red of the blood. The following scene opens with big red doors opening; the baby emperor is taken away from her mother; all this scenes have red tones. Red is the first colour of the chromatic scale. It symbolizes the birth, the vital impulse, the start of every thing (later, when the emperor gets married, red will be the predominant colour in objects in the scene). In the first scene it also symbolizes, of course, Communism and its effects on the Emperor
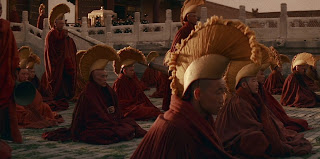

The second colour is orange. It is associated with the range of age between 5 and 8 years; it leads us into the life, it is the warmth of the family, the domestic colour. In the scenes with orange tone, Pu Yi arrives to the Forbidden City, to his new family.
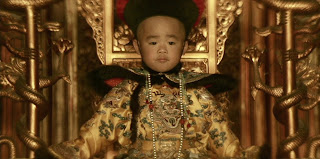


Pu Yi is still a child when he becomes emperor: the tone of the scene becomes yellow. Yellow can be associated to 10 to 15 years of age; it is the colour of puberty, it's intuition and awareness. It is the colour of light, it symbolizes the sun, the divine and its presence, it's the colour of the empire. Storaro uses it throughout the film not only as a tone but even placing in the scene objects of this colour, like the scene of the little emperor playing with the yellow banner which lifts up revealing the courtyard of the Forbidden City full of eunuchs: the rise of the emperor above his subjects.

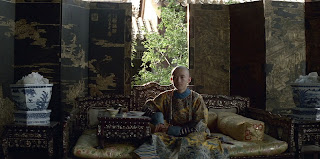


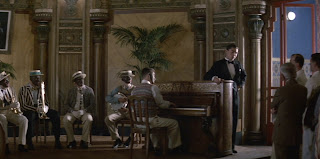
Till this moment the chromatic world of the film is quite poor: red, orange and yellow, alternated with the grey of the scenes of the prisons. Pu Yi has been living in the Forbidden City, ignoring the world outside it; when he starts to acknowledge the existence of that world,  the chromatic scale expands along with this knowledge. This change is represented by green, the colour of spring, of the nature that flourishes, of life that starts again. It represents the age around the 20 years, the study, the knowledge that takes us to freedom. It is brought with the introduction of the British tutor and the green bicycle he gave the emperor as a present.


The centre of our life is represented by blue. It is the colour of freedom,  perspicacity of thinking, the intellect; while red is the past and green the present, blue is the colour of the future. It is the complementary of yellow: while the latter represents the sun, blue is associated with the moon. The tone of the scenes changes into blue when the Emperor leaves the Forbidden City for the first time, exiled by communist: he always wanted to leave his "prison", his limited world but never could because they wouldn't let him. The exile is his freedom.
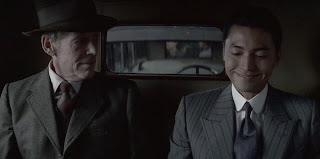


When Pu Yi realizes he want to be again the Emperor of China, the tone of the images becomes indigo. It is the colour associated to the age around 50. Indigo represents full maturity, material power, the achievement of a level of life, a new balance between reason and passion.


During the years Pu Yi is held in prison, the Chinese Government tries to re-educate him to communism. The tone of the scene shot in the prison is always been grey but, as soon has Pu Yi starts to accept his responsibility a violet tone appears. Violet is the full balance between passion and reason, is the diffusion of knowledge, it represents the cyclic nature of life and the age between 70 and 80.
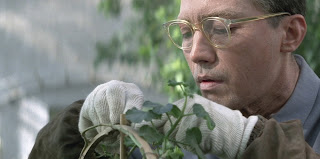


White is the sum of all the colours, therefore it is the sum  of all the ages, of all the phases, feelings and passions. It is life as one, the union and the completeness of it and it is associated with the last years of life. The pure white appears for the first time with snow, when Pu Yi earns his freedom and gets out from jail as a free citizen of the People's Republic of China. He returns to the Forbidden City but this time the image is balanced, with no prevailing tone.


Throughout the film there's one more colour which is always present: black. It is the matrix, the matter, the birth of elements. It is the beginning and the end, the presence and the absence of something and, of course, the unconscious.


The Last Emperor is not only an example of great cinematography by Storaro, it is the demonstration that philosophy, psychology, history, painting and every kind of art go hand by hand with cinematography to achieve a creative and unique way to visually tell a story, it is a must-see film for every cinematographer, Dp or photographer who wants to improve his art.




October 01, 2013

Light tips. How to light a subject with deep-set eyes.

Every subject is different and has different characteristics, that's why we have to light every subject with different light: lighting is a powerful tool to hide or enhance features in a portrait. Here are some tips about how to light a subject with deep-set eyes.

Do not use a harsh Key Light:  a harsh light will produce heavy deep shadows that will intensify the deepness.

Do not use a wide angle lens close to the subject: it increases distance between objects changing the apparent relationship between them, so the deep-set eyes would appear more sunken then they are.

Do use a low soft Fill Light: placing a Fill Light lower than the eyes will brightening them up eliminating the shadows. You could also use a reflector to bounce light up, as well as lowering the Key Light; and remember, softer the light, softer the shadows.

Do place the camera at lower angles: this will change the perspective, making the back-set eyes less perceptible.

Hope you find it useful! Stay tuned for more lighting tips!

September 30, 2013

The Lady and her Self


The idea behind this  fashion shooting for Umbigo Magazine was the one of the duality of the character. The reflection in the windowpane was an unexpected opportunity we could not miss, so we lit accordingly.


September 27, 2013

Light tips. How to light a bald subject

Every subject is different and has different characteristics, that's why we have to light every subject with different light: lighting is a powerful tool to hide or enhance features in a portrait. Here are some tips about how to light a bald subject.

Don't place the Key Light too high: it will reduce reflections and will shade the head.

Don't use a strong Rim Light: a very strong illuminated outline will highlight the baldness.

Throw some shadows on the area: it will darken the area not showing the baldness. To achieve this you could also use some local diffusion.

Try lowering the camera: a lower point of view will hide the superior part of the head. For certain shots, framing the subject cutting the forehead may help too.

Avoid using the Rim Light: with no Rim Light separating the subject from the background, you will create a sfumato, where the subject and the background will softly blend into each other, hiding the baldness.

Hope you find it useful! Stay tuned for more lighting tips!

September 18, 2013

Know light. How to control light. Tools and tips.

Either if you shooting in a studio or outdoor, you have different ways to control and modify the light to get the the atmosphere you want. here are some of them.

Reflectors. The most popular light modifiers, they consist in a special piece of fabric over a frame and they bounce back the to the subject the light of a light-source. They can be differently coloured, being the most used white, silver and golden; each one of the colour will bounce a different kind of light, softer or harsher or , with the golden surface, warmer. White boards can be also used as reflectors, but not everyone of them is suitable for photographic purposes: the nature of the material or the painting can generate colour casts on the subjects, so you need something which reflects pure white , like a piece of expanded polystyrene.

Softboxes. Mounted directly on the flash head, they produce a soft, involving and diffused light generating a soft edge shadow, They come in different shapes (square, rectangular, octagonal) and sizes to proper illuminate depending on the size of the area we want to light. For some photographers, the use of big soft boxes and its characteristics makes unnecessary the use of a Fill light.

Umbrellas.  They produce a wide and soft light and, if shooting subjects, a bright spot on the tip of the nose. There are two kinds of umbrellas, the ones which bounce back the light and the translucent ones which allow light to pass trough diffusely.

Snoots. Tubes or similar objects that fit over a studio light and help to control the direction of light concentrating it in a small beam. they can have a cylindrical, conical or rectangular shape. Snoots highlight a specific area of the scene leaving other areas in shadow.

Honeycomb grids. They are grids mounted on snoot, softboxes, head lamps which narrow the beam of light to a circle with soft edges. They have different degrees to a better control of light: the smaller the degree, the smaller the beam and the soft edge.

Beauty dish. It is a parabolic reflector mounted on a lamp head that focuses the light towards a point though in a soft and wrapping way. It is especially used in fashion portrait as an alternative to soft-boxes when a more contrasty and dramatic look is wanted.

Flags. They are black panels that absorb light and stop it to reach a specific area of the scene, deepening the shadows and creating contrast. The also prevent light spill into the lens. The closer they are placed to the light source, the softer will be the shadow.

Filters. All objects that intercept light and let it pass trough without modifying the lens focal lens are filters. They can be colour gel or colour filter by which colour temperature and colour balance is controlled, colour filters to control contrast, density filters to control the quantity of light,  blocking filter to block radiations, polarizing filters to control the direction of light... this theme is so extensive we need a dedicated post to talk about it. The most commonly used are colour filters; they are thin transparent coloured sheets that are placed in front of the light intercepting the beam. They come in different colours to proper balance the light being the most used the CTO (orange) and CTB (blue). Another very used filter is the diffusion filter which softens light. They have different intensities and not really a long life: lamp heat will melt them or make the colour fade, so depending on the energy absorbed, they need to be often changed.

Barn doors. if you are shooting with continuous light yo have an extra tools: barn doors. They are metal flaps attached to a square frame on the lamp head. They block the light coming out from the source allowing to illuminate a specific area of the scene. They can be moved in different angles but be careful! always use gloves when manipulating them because they get really hot.

Cine Foil. Can you imagine barn doors which are very flexible and malleable, on where you can make cut-outs of any shape you want to create original light patterns? That is a cine foil, a black aluminium foil most used in cinematographic productions.

As you see, there are several tools to control lights. Use them creatively to get different and original results, go and experiment with them!


September 16, 2013

Where the Land Ends


With this pic I am starting a new project: a look into the suburbs, the forgotten places away from the middle class eyes, the uncommon beauty of the different,  the land of the South, the land of where the land ends. Hope you like it!

September 06, 2013

Light Tip. Preventing power surge damage. How to turn the lights on.

Are you going to light a scene? Remember that when you turn the light on, the electric intensity goes up around 20% than the normal (i.e.: when light is normally on). For example, let's say you have 3 Tungsten lamps of 1000w each and the maximum power your installation can offer is 3300w. Which is fine because you only need 3000w in total: you still have enough watts to connect your PC and a battery charger.

But, if you add that 20% extra lights need to be turned on, you'll find yourself that you are exceeding the maximum power by 300w:

3 x 1000w = 3000w
20% of 3000w = 600w  
3000w + 600w = 3600w > 3300w

In order to protect your equipment (or the one you are renting) you should always turn the lights on one by one, leaving enough room for the light to get that 20% extra of energy needed.

Now that lights are on, start shooting!

August 05, 2013

Fashion shooting on film


One more pic from the editorial published in Umbigo Magazine. I used a MF camera and my favourite film, Kodak Portra 400 processed at home with C-41.

July 12, 2013

Knowing Light. Lighting set-ups (IV)

Missed part III? read it  here.

Let's continue with more light set-ups.

Rim Lighting. If the Key light is placed behind the subject only the outline will be illuminated leaving the subject in shadow. It is used to create silhouettes and express a sense of mystery and intrigue in a very artistic way. You can choose to soften the effect by placing a Fill light or a reflector in font of the subject. Rim lighting is very often used in conjunctions with more lights because it helps to separate the subjects from the background and to highlight hair.
Back lighting. When the rim lighting is not that extreme we have a light set-up which is especially used for translucent objects like bottles and glasses. The key light is normally doubled: two lights of equal power are placed on both side of the subject. You can either choose to light directly the subject or bounce the light with a white background. In both cases you have to be careful with light spills: to prevent this you need to use flags and lens hood.

High key lighting. This set-up is characterized for very bright mid tones, intentionally blown highlights and very few shadows. The key light is positioned on one side of the subject at 45º, while the fill light in the opposite side at the same degree. The background has to be white and illuminated by two background lights of the same power.

All these lighting set-ups are really variations of the triangle set-up we seen in this post. These are the basis but you have to feel free to add or remove lights, change positions, directing the subject towards one light or another and move around: you'll see how light and its effects change by doing so. This is the best way of learning to master light: practise and experiment.

July 11, 2013

Do you wanna fight? A black and white film boxing gloves advert

Kodak Tmaxx 400 was used for this boxing gloves advert. This is one of my favourite work with Isa, a great model. Would you fight her? I recommend you not...

July 08, 2013

Medium format film fashion shooting in Barcelona


Here's one of the photos of the fashion shooting we did last month in Barcelona. Model is Laura from Francine models, Dress from Valentina Bcn, Jewellery by Luz Vargas. The art direction is by Gemma Malé and MUA and hair stylist by Lucía Hernandez. Once again I used Kodak Portra 400 home processed with C-41. You can see the making of video here.

June 30, 2013

I love you but I've chosen darkness. A photographic project


I love portrait photography, it's unbelievable the connection you get to establish with people trough this kind of photography. This picture belongs to a series I'm still working on, called I Love You but I've Chosen Darkness by which I try to photograph and reproduce by lighting that "something broken" people sometimes carry inside.